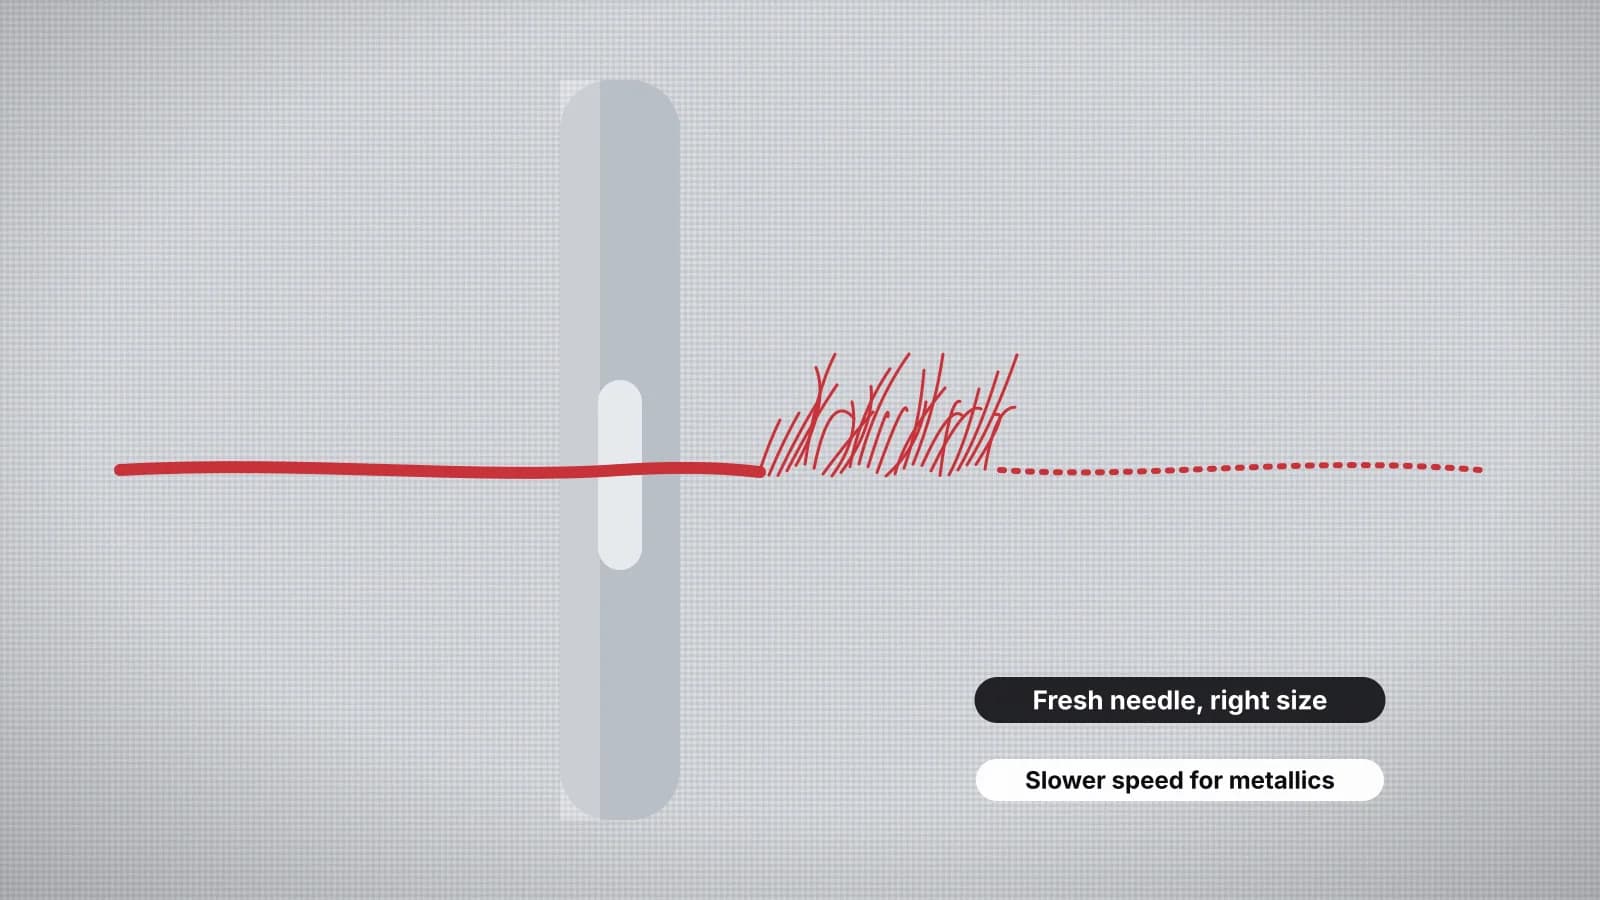
Shredding is the slow version of a thread break. Instead of snapping cleanly, the thread frays into fuzz above the needle, sheds lint and finally parts, often leaving a fluffy tail in the needle eye. The machine keeps stopping, and rethreading on its own rarely fixes it.
Because shredding comes from friction, the fix is finding what's rubbing. This guide goes through the causes in the order worth checking, from the cheapest fix to the rarest. For breaks in general, see why embroidery thread keeps breaking, or answer two questions in the embroidery troubleshooter.
Shredding or breaking: read the broken end
| What the end looks like | What it usually means | Check first |
|---|---|---|
| Fuzzy and frayed, with fibers splayed out | Friction: the thread was rubbed until it wore through | The needle, its size and burrs in the thread path |
| Clean, as if cut | A sharp edge or a sudden snag | Nicks on the needle plate or hook, a spool catching |
| Kinked or looped before it broke | Twist building up as the thread feeds | The spool position, a thread net or a thread stand |
| Frayed only at one spot in the design | Too many stitches in a small area | Density and tiny stitches in the file |
Look at where it frays, too. Fuzz just above the needle eye points to the needle; fraying at one guide, or at the same point in the path whatever thread you use, points to a burr there.
Start with the needle
The needle is the cheapest part to change and the most common cause. A worn point or a tiny burr from hitting a hoop, a pin or a clip frays thread at every stitch, and an eye that's too small for the thread rubs it raw.
| Thread | Needle to try |
|---|---|
| 40-weight polyester or rayon | 75/11; 80/12 on heavier fabrics |
| 30-weight | Often 90/14 |
| 60-weight, for small lettering | 65/9 or 70/10 |
| Metallic | A metallic or topstitch needle, often 80/12 or 90/14 |
- Use embroidery needles, not universal ones: their larger eye and shape protect embroidery thread at speed.
- Fit a new one when shredding starts, straight after a needle strike, and regularly; many embroiderers change every 8–10 hours of stitching.
- Seat it fully, pushed all the way up and facing the right way: on home machines that's usually the flat side to the back. On a multi-needle machine, follow the manual's needle orientation.
- Try a titanium needle if you use spray adhesive or sticky stabilizer, which can gum up the eye; the coating resists the buildup.
The needle guide covers sizes and points in more detail.
Try it with your own design
Sign up free, upload an image and get a stitch preview in under a minute.
Drop your image here
PNG, JPG, SVG, PDF or AI · stays on your device
Not sure what to expect? See real examples or how it works.
Burrs and rough spots in the thread path
If thread keeps shredding at the same point whatever needle and thread you use, something in the path is rough. A needle strike can nick the needle plate, the hook or the bobbin case, and a rough spool notch or guide can catch the thread as it feeds.
- Check the needle plate around the needle hole for nicks you can feel with a fingernail.
- Pull a strand slowly through each guide, from the spool to the eye, and feel for a catch.
- Look at the spool for a rough notch, or a cap too small for the spool, that the thread rubs as it comes off.
- Have damaged parts repaired or replaced. A dealer or technician can polish or replace a nicked plate or hook; don't file metal parts yourself unless your manual explains how.
Think about when the shredding started. If it began right after the needle hit the hoop or a pin, a burr is the likely cause.
The maintenance guide covers cleaning and checking the hook area safely.
Tension and threading
- Rethread from the spool with the presser foot up, so the thread seats in the tension discs. A thread that has jumped out of a guide drags and frays.
- Loosen the top tension a little if it's too tight, since tight tension strains the thread at the eye on every stitch. Bobbin thread showing on the front of the design is a sign it's too tight.
- Check the balance on the back of a satin column: with balanced tension, about the middle third shows bobbin thread.
- Clean out lint from the tension discs and the bobbin area, since lint adds drag.
- Check the bobbin: the right type for your machine, evenly wound and inserted the right way.
Adjust in small steps and test after each change. Why bobbin thread shows on top explains how to read tension from the back, and the threading guide walks through the thread path.
Thread quality and feeding
- Use embroidery thread. Polyester embroidery thread is the strong, practical default; regular sewing thread frays more at embroidery speeds.
- Test old thread by pulling a length between your hands: if it snaps or frays easily, keep that spool for practice. Sunlight, heat and dry air make thread brittle, rayon and cotton most of all.
- Watch for uneven thread, with thin spots, slubs or a lot of lint.
- Feed it smoothly. Use a spool cap that fits, a thread net on slippery spools and a stand for cones, so the thread doesn't jerk or twist on its way to the needle.
The thread guide covers fibers, weights and storage.
Speed and metallic thread
Speed adds friction and heat at the needle. Standard 40-weight polyester usually copes with a machine's full speed, but metallic, fine and specialty threads often don't.
- Slow the machine down for metallic and specialty thread, and follow the lower speed your manual gives for caps.
- Use a metallic or topstitch needle, with its larger, smoother eye.
- Feed metallic from a stand or a spool in a thread net, so it can untwist before the first guide.
- Loosen the top tension slightly for metallic, and keep regular thread in the bobbin.
- Keep metallic to outlines and small areas, not dense fills.
The metallic thread guide has the full setup, and the metallic thread entry sums it up.
Practice on a free design
167 ready-to-sew designs in every machine format, free with an account.



When the design is shredding the thread
If the thread shreds in one part of the design every time while the rest sews cleanly, the file is the likely cause: too many stitches packed into a small area, fill and satin layered on top of each other, or lots of very short stitches, often from a design shrunk too far.
- Find the spot in the sew-out simulator, or in the embroidery file checker, which shows a density heatmap and tiny stitches.
- Don't shrink a stitch file by more than about 10–20%; digitize the artwork again at the new size instead.
- Lighten the density. About 0.4 mm between fill rows is a common start for 40-weight thread; the density guide explains the trade-offs.
When you have the artwork, the Embrizo digitizer lets you set the final size before you download, pick the fabric preset and lighten the fill density a step, and its design check flags very high stitch counts and fine detail. Digitizing and previewing are free with an account; downloading the file needs a plan.