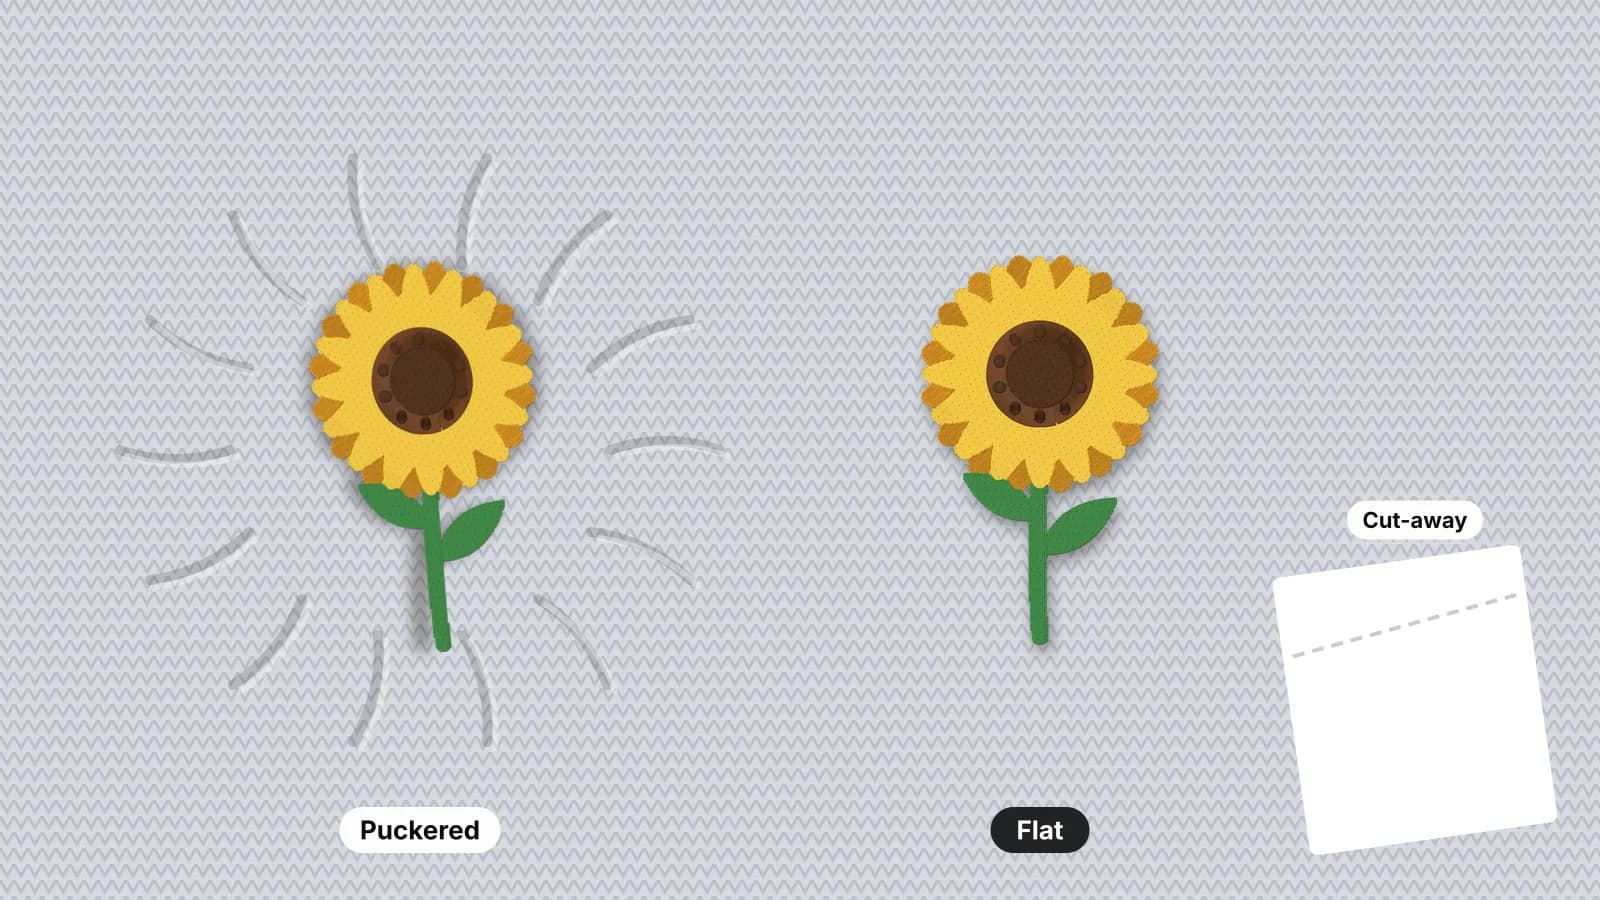
Puckering is the fabric gathering, rippling or wrinkling around the stitching. It happens when the stitches pull the fabric in more than the stabilizer can hold, and it usually shows as soon as the piece comes out of the hoop, or after the first wash.
Several things cause it, and they add up, so the fix is often two small changes rather than one big one. This guide starts with a cause-and-fix table, then takes each fix in turn. The problems and fixes guide covers the other common faults, and the puckering entry has the short version.
Puckering causes and fixes at a glance
| What you see | Likely cause | Fix |
|---|---|---|
| Ripples all round a design on a T-shirt or hoodie | Tear-away on a knit | Cut-away or no-show mesh, fused if you can |
| Puckers that appear once it's unhooped | The fabric was stretched in the hoop | Hoop flat, never stretched; don't tug after hooping |
| Wrinkles across a large fill | Too many stitches for the fabric | Lighter density, or a heavier backing |
| Puckers plus gaps between colors | The fabric shifted, or too little pull compensation | A firmer backing, better hooping, more pull compensation |
| Puckers along satin columns | Top tension too tight, or columns too wide for the fabric | Ease the top tension; sew wide shapes as fill |
| Puckers that appear after washing | The fabric shrank, or tear-away under a knit broke down in the wash | Prewash cotton; cut-away on garments |
| Fabric gathered in the middle of a big hoop | Hoop much larger than the design | Use the smallest hoop that fits |
Change one thing at a time and test on a scrap of the same fabric with the same backing. If you change the backing, the hooping and the file at once, you won't know which fixed it.
Fix 1: The right stabilizer
The most common cause is a backing too light for the fabric or the design. The stabilizer has to hold the fabric still for every stitch, and on knits it has to keep holding through every wash.
| Fabric | Backing that prevents puckers | More detail |
|---|---|---|
| T-shirt jersey | No-show mesh or light cut-away, fused if you can | T-shirts |
| Polo piqué | No-show mesh, with a topping for small text | Polo shirts |
| Hoodie or sweatshirt | Medium cut-away | Hoodies |
| Performance and stretch | No-show mesh, fusible if possible, hooped gently | Performance fabric |
| Woven shirt | Light or medium tear-away | Woven shirts |
| Denim and canvas | Medium tear-away, or cut-away for dense designs | Denim |
- Anything that stretches needs cut-away. Tear-away breaks up as the fabric moves and stops supporting it.
- Dense design, heavier backing. A large filled logo may need a heavier cut-away or a second layer, even on a stable fabric.
- Bond slippery fabric to the backing with a fusible stabilizer or a light mist of spray adhesive, so the two move as one.
The stabilizer finder suggests a backing for your fabric and design density, and the stabilizer guide explains each type.
Try it with your own design
Sign up free, upload an image and get a stitch preview in under a minute.
Drop your image here
PNG, JPG, WebP or SVG · stays on your device
Fix 2: Hoop flat, not stretched
- Hoop knits as they lie. A stretched knit springs back after stitching and gathers around the design. The lines of the knit should stay straight and evenly spaced.
- Hoop wovens taut, not distorted: firm like a drum, with the grain still straight.
- Don't pull the fabric once the hoop is closed. Re-hoop instead.
- Use the smallest hoop that fits the design, so the fabric in the middle can't move.
- Float what won't hoop on sticky stabilizer, with a basting box around the design to hold it.
The hooping guide goes step by step, with the right tension for each fabric.
Fix 3: Density, underlay and pull compensation
If the backing and hooping are right and it still puckers, look at the file. More stitches pull harder, and a design made for denim or twill can be too dense for a T-shirt.
- Lighter density. Opening up the fill spacing a little cuts the stitch count and the pull. The density guide gives typical values.
- The right underlay. Underlay anchors the fabric to the backing before the top stitches pull on it. Too little lets the fabric shift; very heavy underlay under a dense fill just adds stitches.
- Enough pull compensation. Shapes are sewn slightly wider than drawn so they still meet after the fabric pulls in, and knits need more. See pull compensation.
- Don't shrink a stitch file much. Scaling a design down packs the same stitches into less space. Past about 10–20%, digitize it again; see the resizing guide.
- Sew wide shapes as fill. Satin columns wider than about 7 mm pull hard on the fabric beside them.
In the digitizer, pick the fabric preset before you download. The knit and stretch presets lighten the density slightly and add more pull compensation and heavier underlay, which heads off a lot of puckering on T-shirts and performance wear.
Fix 4: The fabric and thread tension
- Prewash fabric that shrinks. Cotton and linen can shrink in the first wash and pucker around stitching that doesn't.
- Match the design to the fabric. Thin, light or very stretchy fabric can't carry a dense filled logo; choose a lighter design or a heavier garment.
- Check the top tension. Top tension that's too tight draws the fabric up along satin columns. On the back of a satin column, about the middle third should show bobbin thread.
- Check the needle. A dull needle punches the fabric down instead of piercing it cleanly; the needle guide covers sizes and points.
The thread tension entry explains how to read the back of a design.
Rescuing a puckered piece
Light puckering often relaxes with steam. Lay the piece face down on a towel, so the stitches aren't flattened, and steam or press it from the back. A wash can help on cotton. Heavy puckering from a stretched knit or tear-away on a T-shirt rarely comes out fully, so the real fix is the next piece.
Before a run of garments, sew one test on the same fabric with the same backing and hoop, and wash it if the customer will. A pucker caught on a test costs a scrap, not a shirt.
Check the file itself before the test: the embroidery file checker and the file viewer show its size and stitch count, and how to check a file before stitching covers the rest.