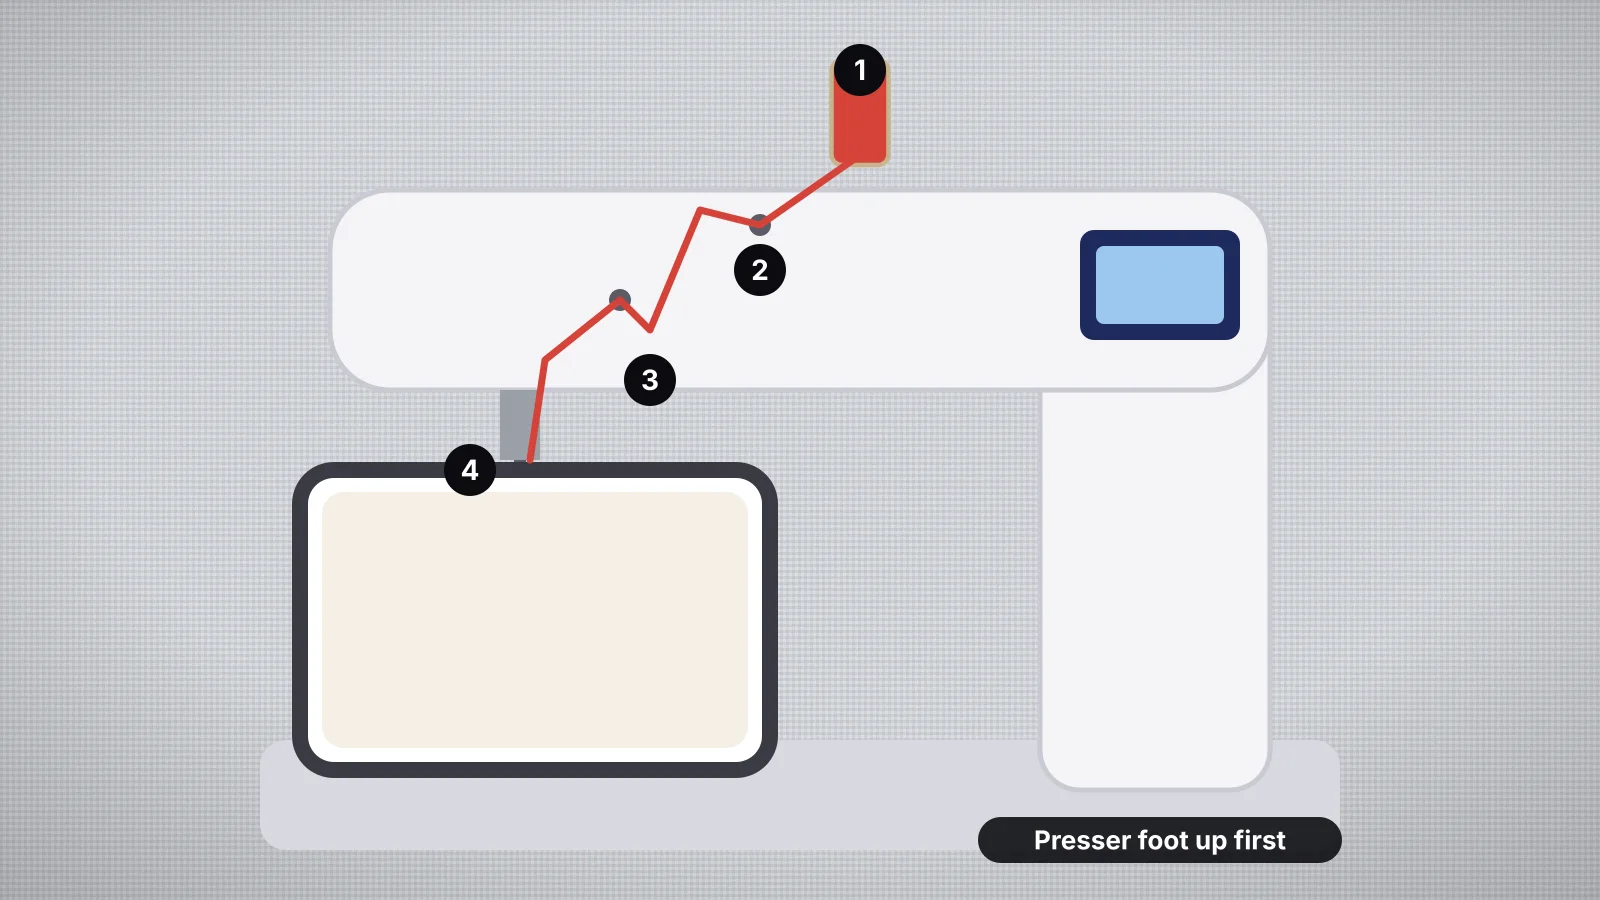
Threading is the job every embroiderer repeats most, and the one behind a large share of stitching problems. Thread that misses the tension discs leaves a birdnest under the fabric, thread that skips the take-up lever snaps or loops, and a bobbin in the wrong way round gives uneven stitches from the first color.
Machines differ in the details, but the path is much the same on almost all of them: spool, guides, tension discs, take-up lever, needle. This guide walks through that path, the needle threader, winding and inserting the bobbin, multi-needle machines and the usual mistakes. Your machine's manual, and the numbered threading guide printed on the machine, come first: follow them wherever they differ from anything here.
Before you start
- Raise the presser foot. On most machines this opens the tension discs, so the thread can drop between them. Threading with the foot down is the most common cause of birdnests.
- Raise the needle to its highest point, with the needle position button or by turning the handwheel toward you. That brings the take-up lever up where you can thread it.
- Turn the machine off, or use its threading mode if the manual says so, so nothing moves while your fingers are near the needle.
- Use the right spool pin and cap. A cap that matches the spool's end stops it wobbling and catching. Cones and large spools need a thread stand on most home machines.
- Use embroidery thread, usually 40-weight polyester or rayon, with a 75/11 embroidery needle. The thread guide compares thread types, and the needle guide covers needle sizes.
Threading the top thread, step by step
- Put the spool on the pin with its cap, so the thread comes off the way the manual shows.
- Pull the thread through the first guide at the top of the machine, holding the end lightly so it stays taut.
- Bring it down the channel to the tension discs. Holding the thread in both hands, ease it between the discs so it seats properly.
- Take it around the bottom of the channel and back up to the take-up lever, and hook it through the lever's eye or slot. If you can't see the lever, raise the needle until it's at its highest point.
- Bring the thread back down through the guides above the needle, including the small guide on the needle bar.
- Thread the needle, usually from front to back, with the threader or by hand, and pull a few inches of thread through.
- Lower the presser foot and start as your manual says. Many embroidery machines hold or trim the tail themselves; others ask you to hold it for the first few stitches.
Check your work before you start: with the presser foot down, pull the thread near the needle and you should feel steady resistance. With the foot up, it should pull freely. No resistance with the foot down means the thread missed the tension discs.
Try it with your own design
Sign up free, upload an image and get a stitch preview in under a minute.
Drop your image here
PNG, JPG, WebP or SVG · stays on your device
Using the needle threader
Many home machines have a built-in needle threader, worked by a lever or a button. It needs the needle at its highest point and the thread guided into its hook exactly as the manual shows. If the hook won't catch, raise the needle, rethread the guides and try again rather than forcing the lever, which can bend the threader's tiny hook.
- Check the needle sizes it handles. Threaders are made for the usual needle sizes, and many can't thread very fine needles such as 65/9; the manual lists the range.
- Thread by hand when it won't work, for example with some specialty threads. Cut the thread cleanly at an angle with sharp scissors, and hold a piece of white paper behind the needle to see the eye.
- A hand needle threader, a fine wire loop, helps with small eyes and metallic thread.
Winding a bobbin
Embroidery uses a bobbin thread finer than the top thread, often around 60–90 weight, usually in white or black. You can wind your own or buy prewound bobbins.
- Use the bobbin type your manual lists. Bobbins that look alike can differ slightly in size, and the wrong one causes tension problems and noise. Common styles include class 15 and L-style; the bobbin entry has more.
- Put the bobbin thread on the winding pin, and take it through the bobbin-winding guide and around its tension disc as the manual shows.
- Wind the end a few turns around the empty bobbin, or through its hole if it has one, and put the bobbin on the winder spindle.
- Push the winder into place and start it. Hold the tail until it's caught, then trim it close.
- Let it wind evenly. An uneven or loose bobbin causes uneven tension, and an overfull one can bind in its case.
Prewound bobbins wind evenly and usually hold more thread, which means fewer stops. They come in several styles, so check that your machine takes the kind you buy.
Inserting the bobbin
Home machines take the bobbin in one of two ways, and commercial machines in a third:
| System | How it goes in | Watch for |
|---|---|---|
| Drop-in (top-loading) | The bobbin drops into a case under a clear cover on the needle plate | The direction the thread unwinds; the cover or manual shows it with an arrow |
| Front-loading bobbin case | The bobbin goes into a removable case, which clips into the machine behind a front cover | The thread has to slide under the case's tension spring |
| Commercial rotary hook | A bobbin, often L-style, goes into a bobbin case that fits into the rotary hook under each needle bar | Follow the manual's steps for the case's tension and orientation |
- Follow the diagram. Getting the unwinding direction wrong is the most common bobbin mistake, and it gives loose or uneven stitches.
- Guide the thread through the slot and under the tension spring until it clicks or catches, then leave a short tail.
- Match the color: white bobbin thread under light fabric, black under dark, so it doesn't peek out at the edges of satin columns.
- Check the balance after a test. On the back of a satin column, the bobbin thread should show as a stripe down roughly the middle third. The thread tension entry explains what to change.
Threading a multi-needle machine
On a multi-needle machine, every needle has its own thread path: a cone on the thread stand, guides, a tension knob, a take-up lever and the needle, usually numbered so you can follow each one. Thread each path the same way as on a single-needle machine, needle by needle, and set the machine's color list to match what's on each needle.
- Change colors by tying on. Many operators cut the old thread near the cone, tie the new color to it and pull it through the path from the needle end, then cut off the knot and thread the eye. It saves threading the whole path again; follow your manual's advice.
- Set the needles from the [color sheet](/embroidery-glossary/color-sheet). DST files store no thread colors, so check each needle's color against the sheet before you start. The embroidery run sheet lists each color stop with its needle number and Brother and Janome thread matches.
- Keep the stand tidy. Cones in the right order and threads that don't cross between guides cause fewer breaks.
The single vs multi-needle guide compares the two kinds of machine.
Common threading mistakes
| Mistake | What you see | Fix |
|---|---|---|
| Threading with the presser foot down | A birdnest under the fabric, or loops on the back | Raise the foot and rethread the top thread |
| Missing the take-up lever | Thread loops, jams or breaks within a few stitches | Rethread with the needle at its highest point |
| Spool catching on its notch, or the wrong cap | Thread breaks, or the tension jumps | Use a cap that fits, turn the notch out of the way or use a thread stand |
| Thread jumped out of a guide | Breaks and shredding | Rethread the whole path, not just the needle |
| Bobbin in the wrong way, or not in its tension spring | Loose, loopy stitches or bobbin thread on top | Take it out and insert it as the diagram shows |
| The wrong bobbin type | Noise, skipped stitches and uneven tension | Use the bobbin your manual lists |
| Needle eye too small for the thread | Shredding at the needle | A 75/11 for 40-weight; larger for metallic and 30-weight |
Still having trouble? Why thread keeps breaking goes through the causes in order, and the problems and fixes guide covers birdnests and tension. Once the machine is threaded and sewing well, try one of the free embroidery designs, browse embroidery ideas for a project, or turn your own artwork into a file with the digitizer.