 Free previewAppliqué makerShapes, Greek and varsity letters or a silhouette as appliqué: placement line, tack-down and satin border, plus a cutting template.Open the tool
Appliqué swaps most of the stitches in a design for a piece of fabric. Instead of filling a shape with thousands of fill stitches, the machine marks where the fabric goes, stitches it down and covers the raw edge with a satin border. The design sews faster, stays soft and shows off the fabric, which is why appliqué is the classic technique for varsity letters, baby clothes and quilts.
Digitizing appliqué is different from digitizing an ordinary design, because the file has to stop and wait for you. This guide explains what an appliqué file contains, the stitch settings for each step, how to cut the fabric to shape, which fabrics work and the mistakes that cause gaps and fraying. For the sewing side, including hooping and trimming, see the machine appliqué guide.
What an appliqué embroidery file contains
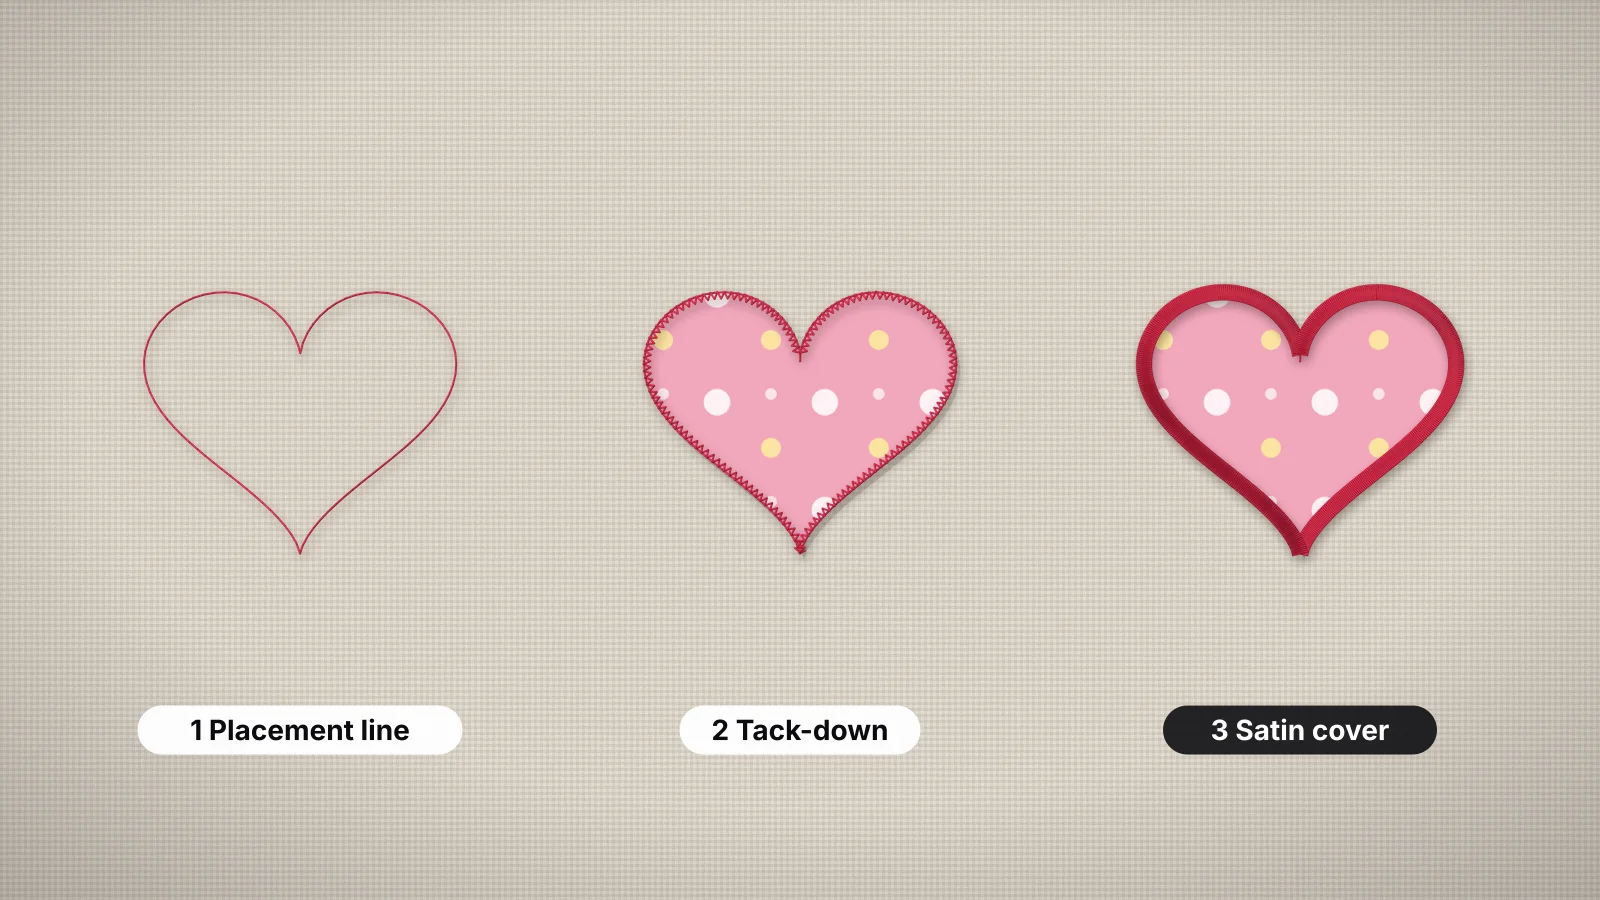
Every appliqué file is built from one outline, used several times. The steps sew in this order, and each one ends with a stop:
| Step | Stitch | What it's for | What you do next |
|---|---|---|---|
| 1. Placement line | A single running stitch on the outline | Shows where the fabric goes on the base fabric | Lay the appliqué fabric over it, with at least 6 mm (1/4 in) extra all round |
| 2. Tack-down | A running stitch, narrow zigzag or E-stitch just inside the outline | Holds the fabric for trimming and for the cover stitch | Trim the extra fabric close to the tack-down, with the fabric still hooped |
| 3. Trim stop (optional) | No stitches, just a stop | A pause to trim on machines that would otherwise carry on | Trim, then restart the machine |
| 4. Cover stitch | A satin border, usually 2.5–4 mm wide | Hides the cut edge and locks the fabric down | Nothing, unless there are details |
| 5. Details | Running, satin or fill on top | Eyes, lettering or lines inside the shape | Change thread as usual |
On home machines a stop is usually written as a color change, so the machine halts whatever thread is loaded. Many files give each step its own entry in the color list, labeled placement, tack-down and cover, so you know which step comes next.
On a multi-needle machine, a color change just moves to the next needle and keeps sewing. Set a stop, or a frame-out that brings the hoop toward you, at the placement and tack-down steps in the machine's color sequence.
Stitch settings for each step
| Step | Stitch type | Typical settings |
|---|---|---|
| Placement line | Single running stitch | Stitch length 2.5–3 mm (0.10–0.12 in), sewn on the outline |
| Tack-down on thin fabric | Running stitch, sewn once or twice | Length 2–2.5 mm, about 1 mm (0.04 in) inside the outline |
| Tack-down on felt, twill or fleece | Open zigzag or E-stitch | Width 1.5–2.5 mm, spacing about 1.5–2 mm, kept inside the cover satin |
| Cover satin | Satin column | Width 2.5–4 mm (0.10–0.16 in), spacing about 0.35–0.45 mm, with an edge-run underlay |
| Pull compensation | On the cover satin | About 0.2–0.4 mm per side, more on knits and thick fabric |
The cover satin should hide the tack-down completely and land about 1 mm past the cut edge onto the base fabric, so the edge is wrapped rather than just covered from above. Satin narrower than about 2.5 mm lets frayed threads poke through. Satin much wider than 4–5 mm starts to float and snag; for a bigger border, add a second decorative outline instead of widening the satin.
- Density. A cover satin is usually a little denser than an ordinary satin, because it has to hide a cut edge. The density guide explains stitch spacing.
- Underlay. The tack-down already does part of an underlay's job. An edge run under the satin keeps its sides crisp; heavy underlay isn't needed. What is underlay covers the types.
- Corners. Sharp points make the satin pile up. Round them off slightly, or use mitered corners.
- Several pieces. Sew from the back piece to the front. Many digitizers place and tack down every piece first, add one trim stop, then sew all the covers, so you only take the hoop off once.
Try it with your own design
Sign up free, upload an image and get a stitch preview in under a minute.
Drop your image here
PNG, JPG, SVG, PDF or AI · stays on your device
Not sure what to expect? See real examples or how it works.
Cutting the fabric: trim in the hoop or pre-cut
There are two ways to get the fabric to shape, and both work with the same file.
| Method | How it works | Best for |
|---|---|---|
| Trim in the hoop | Lay an oversized piece over the placement line, let the tack-down sew, then trim close to the stitches with curved scissors | One-offs, simple shapes and fabrics that don't fray much |
| Pre-cut to shape | Cut the fabric from a template before sewing, lay it inside the placement line and let the tack-down hold it | Letters, repeat orders, tight corners, twill and glitter vinyl |
Pre-cutting needs a cutting template: the exact outline of each fabric piece at the design's real size. Print it at 100% scale, check a measured line with a ruler, and cut along it by hand or with a cutting machine such as a Cricut, Silhouette or Brother ScanNCut.
- Mirror it for fusible web. When you trace onto the paper side of a fusible web such as HeatnBond or Wonder-Under, mirror the template first. The web is fused to the back of the fabric, so a letter traced the right way round comes out backwards.
- Keep it as is for the front. If you trace or cut with the right side of the fabric facing you, use the template unchanged.
- Cut on the line. A piece slightly too big is hidden by the satin. A piece too small leaves a gap the satin may miss.
Making an appliqué file with Embrizo's appliqué maker
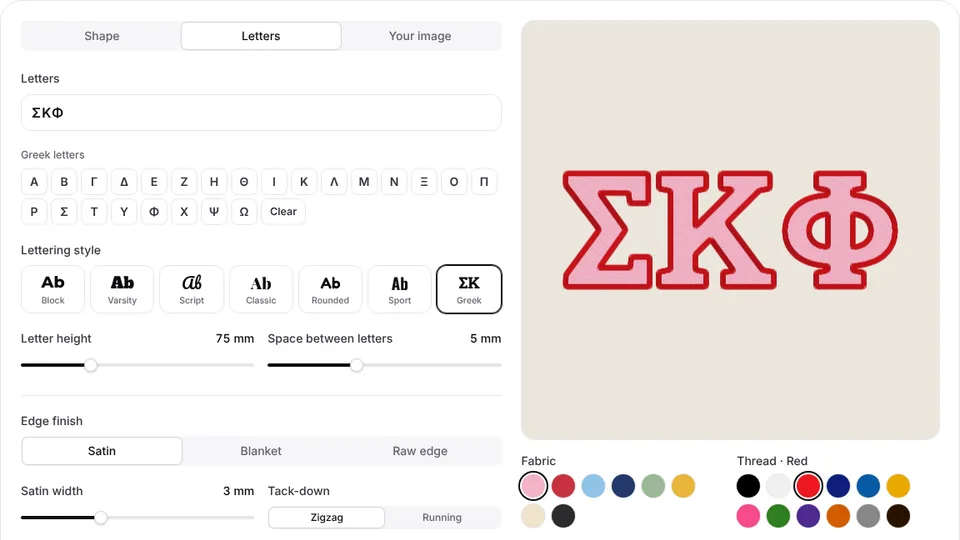
Digitizing appliqué by hand means drawing the outline once, then building the placement line, tack-down and cover from it in desktop software. Embrizo's appliqué maker does that setup for you in the browser, and it's the quickest route from a shape to a working appliqué file.
- Start from a shape, type a few letters or upload a silhouette, such as a heart, a star, an animal outline or a simple logo.
- Set the finished size, keeping the narrowest part of the shape wide enough to trim around.
- The tool builds the three-step file: a placement line, a tack-down and a satin cover over the edge, with a stop between the steps.
- Print the cutting template if you want to pre-cut the fabric. For fusible web, trace it from the back of the printout against a window or light box to get a mirrored copy.
- Check the preview, then save the file in the format your machine reads, such as PES, DST or JEF.
Designing and previewing in the appliqué maker are free; saving the machine file needs a plan, from $8 a month billed yearly. For a fully stitched design instead of appliqué, upload the artwork to the digitizer.
Shapes and sizes that work
- Simple, bold outlines. Hearts, stars, circles, animal silhouettes and block letters. Every inside corner and narrow neck is a place you have to trim around.
- A minimum width. Keep the narrowest part of any piece at least about 8–10 mm (0.3–0.4 in) wide. With a 3 mm satin on each side, a narrower part ends up almost all satin and the fabric barely shows.
- Few small holes. Small enclosed spaces, such as the middle of a small A or O, are hard to cut out. Enlarge the shape, or leave the hole filled with fabric.
- Smooth curves. A silhouette traced from a photo often has jagged edges. Smooth it first, or the satin will wobble.
| Appliqué item | Typical finished size |
|---|---|
| Baby bodysuit or bib | 75–100 mm (3–4 in) |
| Kids' T-shirt or sweatshirt | 100–150 mm (4–6 in) |
| Adult sweatshirt letters, each | 75–100 mm (3–4 in) tall |
| Tote bag or pillow | 125–200 mm (5–8 in) |
| Quilt block | Most of the block, kept at least 13 mm (1/2 in) clear of the seams |
Large pieces are where appliqué earns its place. A filled 150 mm (6 in) heart can take well over 10,000 stitches, while the appliqué version is mostly a satin border, often a few thousand. The stitch count calculator estimates both.
Fabrics for appliqué pieces
| Fabric | Tack-down | Notes |
|---|---|---|
| Quilting cotton | Running stitch | Back it with fusible web so it doesn't fray or shift; prewash it if the item will be washed |
| Wool-blend felt | Running stitch or light zigzag | Doesn't fray, so it's forgiving to trim; cheap craft felt can pill |
| Tackle twill | Zigzag or E-stitch | The classic varsity fabric; heat-seal backed twill can be pressed in place before stitching |
| Glitter vinyl and faux leather | Single running stitch | Every needle hole is permanent: pre-cut it, hold it with tape rather than pins and keep the satin slightly lighter |
| Fleece and minky | Zigzag | Stretchy and fluffy: use fusible web and a water-soluble topping |
| Denim and canvas | Running stitch | Sturdy for bags; use an 80/12 or 90/14 needle through the layers |
Choose an appliqué fabric no heavier than the base. The base gets the backing it would need for any design: cut-away on knits such as sweatshirts and tees, tear-away on stable wovens. The stabilizer finder suggests one for your fabric.
Practice on a free design
167 ready-to-sew designs in every machine format, free with an account.



Common appliqué digitizing mistakes
| Problem | Cause | Fix |
|---|---|---|
| Raw edges poke out of the satin | Satin too narrow, or the tack-down too close to the edge | Widen the satin to 3–4 mm and move the tack-down about 1 mm inside the outline |
| A gap between the fabric and the satin | The fabric shifted, or was trimmed too close | Use fusible web or spray adhesive, and trim 1–2 mm from the tack-down |
| The machine sewed straight past the trim step | The file has no stop there, or a multi-needle machine moved to the next needle | Add stops as color changes, or set stops in the machine's color sequence |
| The satin misses the edge | The fabric was unhooped to trim | Take the hoop off the machine but leave the fabric in it |
| Puckering around the shape | Too little backing under a dense satin | Use cut-away on knits and add pull compensation |
| Pre-cut letters came out backwards | The template wasn't mirrored for fusible web | Mirror the template when tracing on the paper side |
| The satin bunches at points | Sharp corners | Round off the points, or use mitered corners |
Test-stitch every new appliqué file on scrap of the same fabrics. The sew-out simulator shows the step order and where the stops fall before you start.